LaravelとVue3を連携してコントローラーから変数を渡す方法

2020 回閲覧されました
みなさんこんにちは、jonioです。
Laravel/uiを使ってLaravelとVueを連携する方法は知っています。

しかしLaravelのバージョン8ではLaravel/uiは非推奨になりました。
じゃあ他の方法を探しInertia(イナーシャ)を見つけたのですがSNSで「これは現場では使わない」と聞きました。

「じゃあどうしよう」と思って他の方法を見つけました。
またLaravelのコントローラーからデータベースの変数をvueに渡してそれを表示する方法も調べました。
結構簡単にできると思うのですが上手くできなくて困っている人・自分が次に同じことをする時のアウトプットとしてこの記事を残します。
目次
Laravelのバージョン
8です。
導入にあたって
Laravelのプロジェクトは作成しているのを前提とします。
Vueのインストール
下記のコマンドでvueをインストールします。
npm install vue@next vue-loader@nextインストールが終わってLaravelのプロジェクト直下にあるpackage.jsonを見るとvueが追加されているのを確認できます。
下記は私の環境ですので人によって若干違います。
{
    "private": true,
    "scripts": {
        "dev": "npm run development",
        "development": "mix",
        "watch": "mix watch",
        "watch-poll": "mix watch -- --watch-options-poll=1000",
        "hot": "mix watch --hot",
        "prod": "npm run production",
        "production": "mix --production"
    },
    "devDependencies": {
        "@popperjs/core": "^2.10.2",
        "axios": "^0.21",
        "bootstrap": "^5.1.3",
        "laravel-mix": "^6.0.6",
        "lodash": "^4.17.19",
        "postcss": "^8.1.14",
        "resolve-url-loader": "^5.0.0",
        "sass": "^1.32.11",
        "sass-loader": "^11.0.1",
        "tailwindcss": "^3.3.5"
    },
    "dependencies": {
        "vue": "^3.2.36",           //この行が追加される
        "vue-loader": "^17.3.1"     //この行が追加される
    }
}
バージョンは人によって多少違うはずです。
webpack.mix.jsの追記
webpack.mix.jsに追記します。
const mix = require('laravel-mix');

/*
 |--------------------------------------------------------------------------
 | Mix Asset Management
 |--------------------------------------------------------------------------
 |
 | Mix provides a clean, fluent API for defining some Webpack build steps
 | for your Laravel application. By default, we are compiling the Sass
 | file for the application as well as bundling up all the JS files.
 |
 */

mix.js('resources/js/app.js', 'public/js')
    .js('resources/js/common.js', 'public/js/common.js')
    .sass('resources/sass/app.scss', 'public/css/app.css')
    .sass('resources/sass/another.scss', 'public/css/another.css')
    .vue()                   //この行を追記
    .sourceMaps();
15行目〜17行目は私の環境で使うので記述しています。
18行目だけを追記してください。
vueファイルの作成
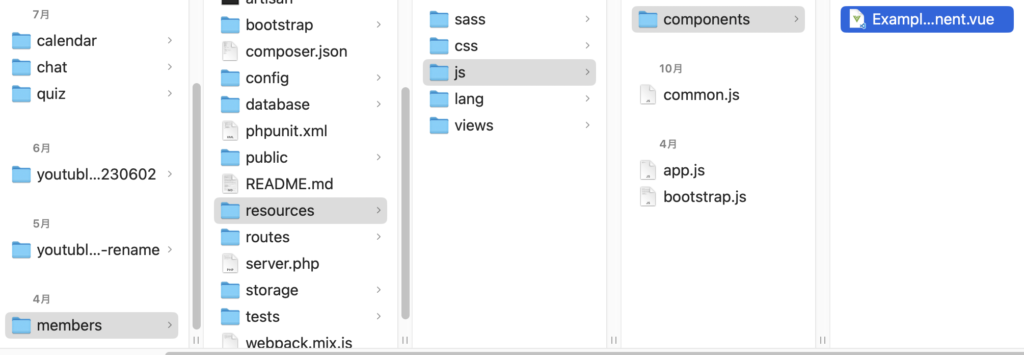
「Laravelのプロジェクト > resources > js」の下にcomponentsフォルダを作成してその下に「ExampleComponent.vue」を作成します。
そしてExampleComponent.vueに記述します。
<template>
<div class="container">
  <div class="row justify-content-center">
    <div class="col-md-8">
      <div class="card">
        <div class="card-header">Vueは友達</div>
      </div>
    </div>
  </div>
</div>
</template>
vueを使うことができるようにする
「Laravelのプロジェクト > resources > js > app.js」に追記します。
require('./bootstrap');


//ここから追加
import { createApp } from 'vue';
import ExampleComponent from "./components/ExampleComponent";

createApp({
    components: {"example-component": ExampleComponent}
}).mount('#app')
6行目・9行目の「ExampleComponent」はさっき作成したvueのファイル名です。
ファイル名は「ExampleComponent.vue」でしたが「.vue」を取って記述します。
ExampleComponent.vueを9行目の「example-component」という名称で使うことができます。
Laravelのviewを作成
「Laravelのプロジェクト > resources > views > example.php」を作成します。
そして下記の記述をします。
<!DOCTYPE html>
<html lang="ja">
    <head>
        <meta charset="UTF-8">
        <title>vueのデモ</title>
    </head>
    <body>
           <div id="app">
           <example-component></example-component>
          </div>
        </div>
        <script src="{{ asset('js/app.js') }}"></script>
    </body>
</html>
9行目の「example-component」はたった今記述したやつです。
app.jsを読み込むために12行目は必ず付けます。
ルーティングとビルド
web.phpにルーティングの記述をします。
Route::get('/', function () {
    return view('example');
});
そして下記のコマンドを叩いてvueを反映させます。
npm run devvueを変更するたびにこのコマンドを叩かないといけません。
それか下記コマンドを叩くとvueを変更するたびに勝手に反映されます。
npm run watch表示の確認
トップページにアクセスすると「Vueは友達」と表示されるのが確認できるはずです。
次はデータベースの情報をコントローラーからvueに渡して表示します。
データベースの確認
テーブルは「Administrator_contacts」・モデルは「Administrator_contact」を使うとします。
テーブルの中身は以下になっていますがidカラムの値を使います。

コントローラー
変数を渡すコントローラーのコードを下記にします。
<?php

namespace App\Http\Controllers;

use Illuminate\Http\Request;

use App\Models\Administrator_contact;                //この行を追加

class AnotherController extends Controller
{
    public function termsPage(){

        $demos = Administrator_contact::all();       //この行を追加

        return view('example', compact('demos'));  //「compact('demos')」を追加
    }
}
Viewの修正
example.phpを修正します。
<div id="app">
  <terms-component
    :demos = "{{ $demos }}"        //この行を追加
  ></terms-component>
</div>
3行目の「 $demos」はたった今修正したコントローラーの「$demos」と同じです。
vueのExampleComponent.vueに変数「$demos」を「:demos」として渡します。
ExampleComponent.vueの修正
ExampleComponent.vueを以下に修正します。
<ul>
  <li
    v-for="demo in demos"
    :key = "demo.id"
  >{{ demo.id }}</li>
</ul>
3行目の「demos」はexample.phpにあった「:demos」の「demos」のことです。
5行目の「demo.id」のidは「Administrator_contacts」テーブルのカラム名(idカラム)です。

これでexample.phpを表示するページにアクセスすると「1」・「2」が表示されます。