LaravelにJavaScriptでAjaxをしてテーブルに値を保存する方法

1257 回閲覧されました
みなさんこんにちは、jonioです。
今回はLaravelにAjaxを導入して値をコントローラーに渡してテーブルに保存する方法を解説します。
Ajaxとは
例で説明します。
あなたがWEBサイトに訪問してあるページにアクセスしたとします。

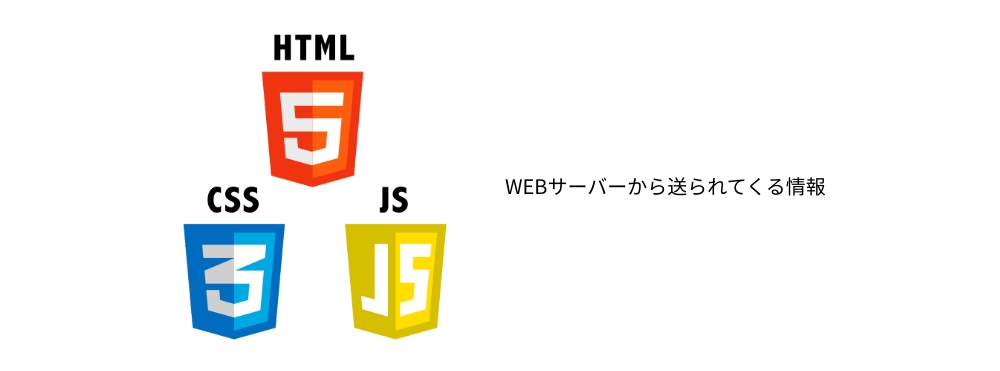
するとWEBサーバーがページを見るのに必要な情報を送ってくれてページの閲覧ができます。
ページを見るのに必要な情報の中にはHTMLファイル・CSSファイル・JavaScriptファイル・画像など色々とあります。
ページを再読み込みしたり他のページに遷移するたびにWEBサーバーから情報を送られてきます。
送られてくる情報の中でJavaScriptだけ特殊なことができて画面読み込みをせずに他の処理の邪魔にならないようにWEBサーバーとやり取りができます。
このWEBサーバーとやり取りをするのを非同期通信といいます。
そして非同期通信をしてWEBサーバーとXML(HTMLの親戚みたいなやつ)形式のデータをやり取りをすることをAjaxといいます。
ちなみにAjaxは「Asynchronous JavaScript + XML」の略称です。
それではJavaScriptでAjaxを使ってビューのデータをコントローラーに渡してそれをテーブルに保存します。
やりたいこと
今回は私がアプリを作る際に導入したAjaxで解説していますが必要な部分だけをあなたの実装に使ってください。
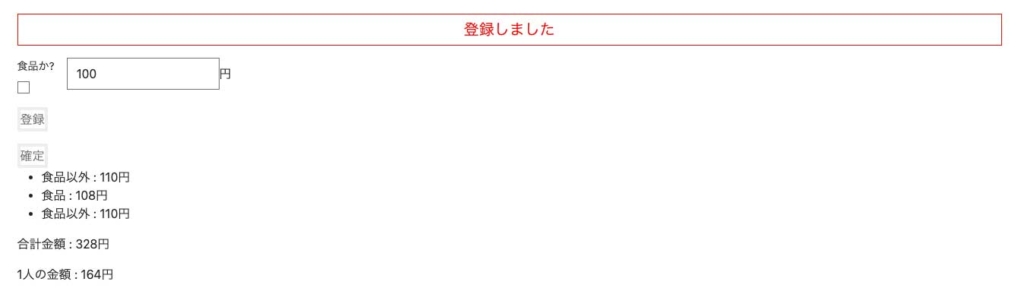
フォームに数値を入力して登録ボタンを押すと確定ボタンの下に消費税込みの金額が表示されます。

複数の登録結果も表示できます。
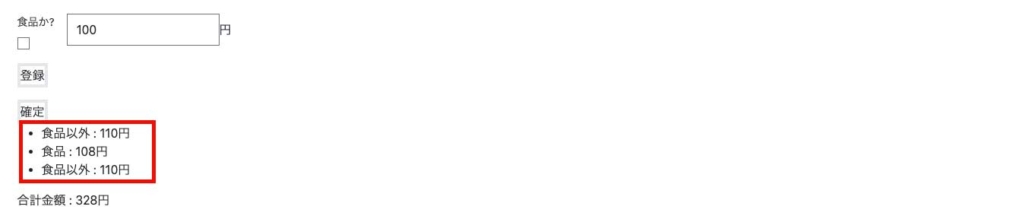
そして確定ボタンを押すと合計金額をテーブルに登録できます。
マイグレーションファイル
下記です、いたってシンプルにしています。
class CreatePricesTable extends Migration
{
    /**
     * Run the migrations.
     *
     * @return void
     */
    public function up()
    {
        Schema::create('prices', function (Blueprint $table) {
            $table->id();
            $table->integer('total_price');
            $table->timestamps();
        });
    }

    /**
     * Reverse the migrations.
     *
     * @return void
     */
    public function down()
    {
        Schema::dropIfExists('prices');
    }
}
css
下記になります。
.disabled{
  pointer-events:none;
  opacity:.7;
}
.register{
  font-size: 20px;
  color:red;
  display: none;
}
.display{
  display: block;
  border:1px solid red;
  padding: 5px;
}
li{
  list-style:disc;
}
ビューとJavaScript
コードを下記にします、Ajaxに関係あるコードのみ解説します。
<div class="container pt-6 pb-6">
    <p class="register text-center" id="register">登録しました</p>
    <form id="priceForm" method="POST" action="price.store">
        @csrf
        <div class="d-flex gap-3">
            <div>
                <p class="mb-1 small">食品か?</p><input type="checkbox" id="checkbox">
            </div>
            <div>
                <input type="number" value="100" id="number">円
            </div>
        </div>
        <input type="button" id="submit" value="登録" class="border-4 d-block mt-3">
        <input type="submit" id="confirm" value="確定" class="border-4 d-block mt-3">
        <ul id="resultsContainer"></ul>
        <p id="totalPrice"></p>
        <p id="halfTotalPrice"></p>
    </form>
    <a href="/">合計金額一覧へ</a>
</div>

<script>
    const registerField = document.getElementById('register');
    const priceInput = document.getElementById('number');
    const checkbox = document.getElementById('checkbox');
    const resultInput = document.getElementById('result');
    const submitButton = document.getElementById('submit');
    const totalPriceElement = document.getElementById('totalPrice');
    const confirmButton = document.getElementById('confirm');
    const halfTotalPrice = document.getElementById('halfTotalPrice');
    let totalPrice = 0;
    let resultPrice = 0;
    let displayPrice = [];

    submitButton.addEventListener('click', (e) => {
        let price = priceInput.value;

        let text = null;

        e.preventDefault();

        if (checkbox.checked) {
             resultPrice = Math.round(price * 1.08);

             text = "食品 : ";
        } else {
             resultPrice = Math.round(price * 1.10);

             text = "食品以外 : ";
        }

        totalPrice += resultPrice;

        resultsContainer.innerHTML += `<li>${text}${resultPrice}円</li>`;

        totalPriceElement.textContent = `合計金額 : ${totalPrice}円`;

        checkbox.checked = false;

    });

    confirmButton.addEventListener('click', (e) => {
        e.preventDefault();

        submitButton.classList.add('disabled');

        confirmButton.classList.add('disabled');

        registerField.classList.add('display');

        halfTotalPrice.textContent = `1人の金額 : ${totalPrice / 2}円`

        displayPrice.push(totalPrice);

        fetch('/calculate/store', {
            method: 'POST',
            headers: {
                'Content-Type': 'application/json',
                'X-CSRF-TOKEN': '{{ csrf_token() }}'
            },
            body: JSON.stringify({ sendKey: displayPrice })
        })
        .then(response => response.json())
    })
</script>
Ajaxを使うと画面の読み込みをしませんがフォームの確定ボタンは画面の再読み込みが入ってAjaxを無効にするのでそれを防ぐ為に63行目があります。
Ajaxをしているのは75行目〜83行目です。
75行目の「/calculate/store」はweb.phpのルートに合わせます。
私のルーティングは下記にしています。
Route::controller(PriceController::class)->group(function(){
  Route::post('/calculate/store', 'store')->name('price.store');
});
76行目の「POST」はweb.phpのHTTPリクエスト(Route::postのpost)に合わせます。
web.phpではpostになっているので76行目もPOSTにしています。
77行目〜80行目はcsrf用のTokenを発行しています。
これがないと送信ができません。
81行目はコントローラーに渡すデータの設定をしています。
「sendKey」がkeyにあたり「displayPrice」がvalueにあたります。
displayPriceは73行目のdisplayPrice(合計の数値が入る所)と同じ名称にします。
83行目でコントローラーにデータを渡します。
コントローラー
コードを下記にします。
public function store(Request $request)
{
  $formInputs = $request->validate([
    'sendValue' => 'required|array',
  ]);

  $displayPrice = $formInputs['sendKey'];

  foreach ($displayPrice as $registerPrice) {
    Price::create([
      'total_price' => $registerPrice
    ]);
  }
  return response()->json();
}
ビューに記述した「body: JSON.stringify({ sendKey: displayPrice })」の「displayPrice」は7行目の「$formInputs[‘sendKey’]」にあたります。
コントローラーから渡した値(displayPrice)を9行目〜13行目で使ってテーブルに登録しています。
displayPriceは今回は1つしかないので配列の要素にする必要はないですが練習用なのでこうしました。
それと14行目がないとテーブルへの登録ができないみたいです。
これで完成です。