初心者向け。JavaScriptで作るカレンダーアプリ

5574 回閲覧されました
こんにちは、WEB制作のエンジニアのjonioです。
今回はProgateでJavaScriptを勉強した後に学習するのに向いているカレンダーアプリの作り方について解説します。
Progateを勉強した直後だと一部がかなり難しく感じるかもしれませんが頑張って理解してください。
関数ですがアロー関数を使うので知らない人はググってください。
それでは解説します。
目次
カレンダーの内容
↓がカレンダーです。
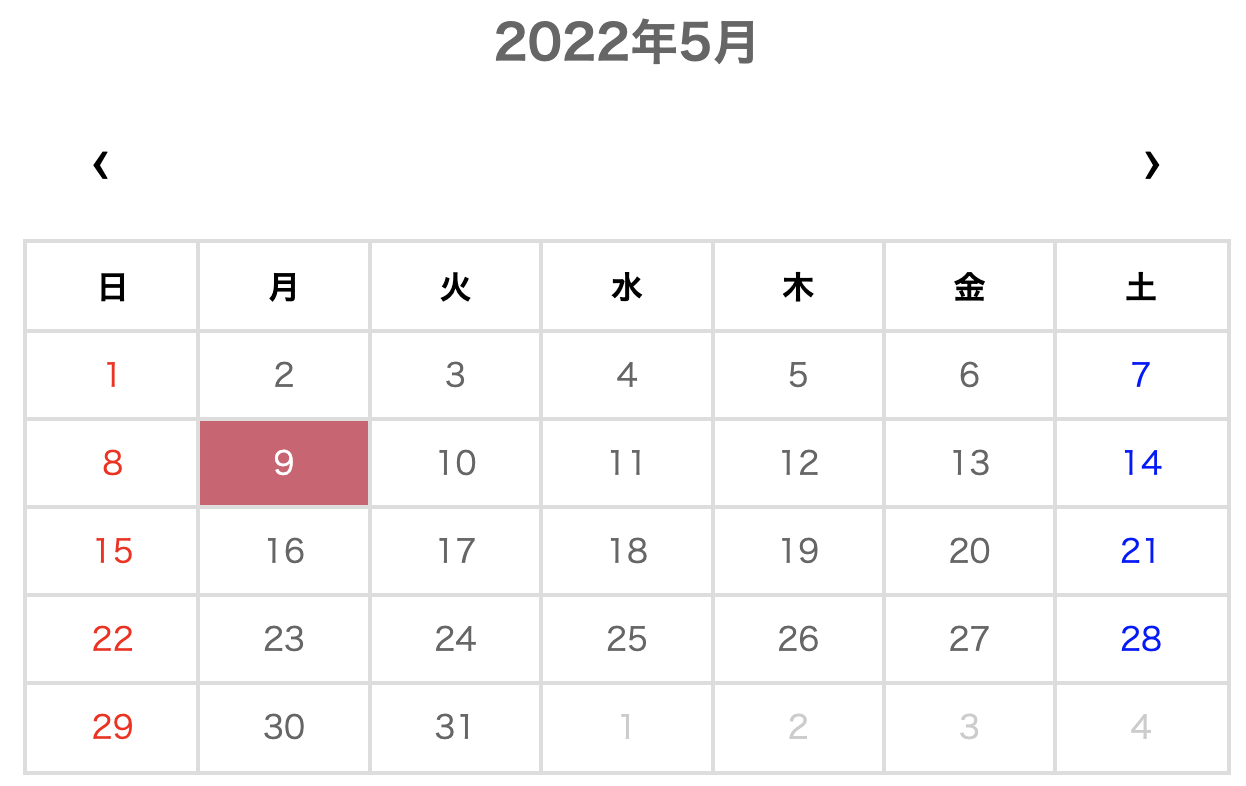
「2022年5月」の下にある「>」を押すと次の月のカレンダーの表示になって「<」を押すと前の月のカレンダーの表示になります。
9日の背景色がピンク色になっていますが本日の日付です。
カレンダーアプリのデモ
デモはここから見る事ができます。
HTMLとCSSのコード
コードは↓になります。
これで表示が↓になります。
 それではカレンダーを作るためにJavaScriptの記述をしますがまずは年月を表示します。
年月の表示
JavaScriptのコードを↓にします。
これで表示が↓になります。

コードの解説をします。
1行目で現在の日時の取得をします。
2行目の「new Date(today.getFullYear(),today.getMonth(),1)」で現在の年度の現在の月の最初の日を取得しています。
5行目〜7行目は「<」をクリックした時に前の月に戻るための記述(今の段階では動きません)で 9行目〜11行目は「>」をクリックした時の次の月に進むための記述(今の段階では動きません)です。
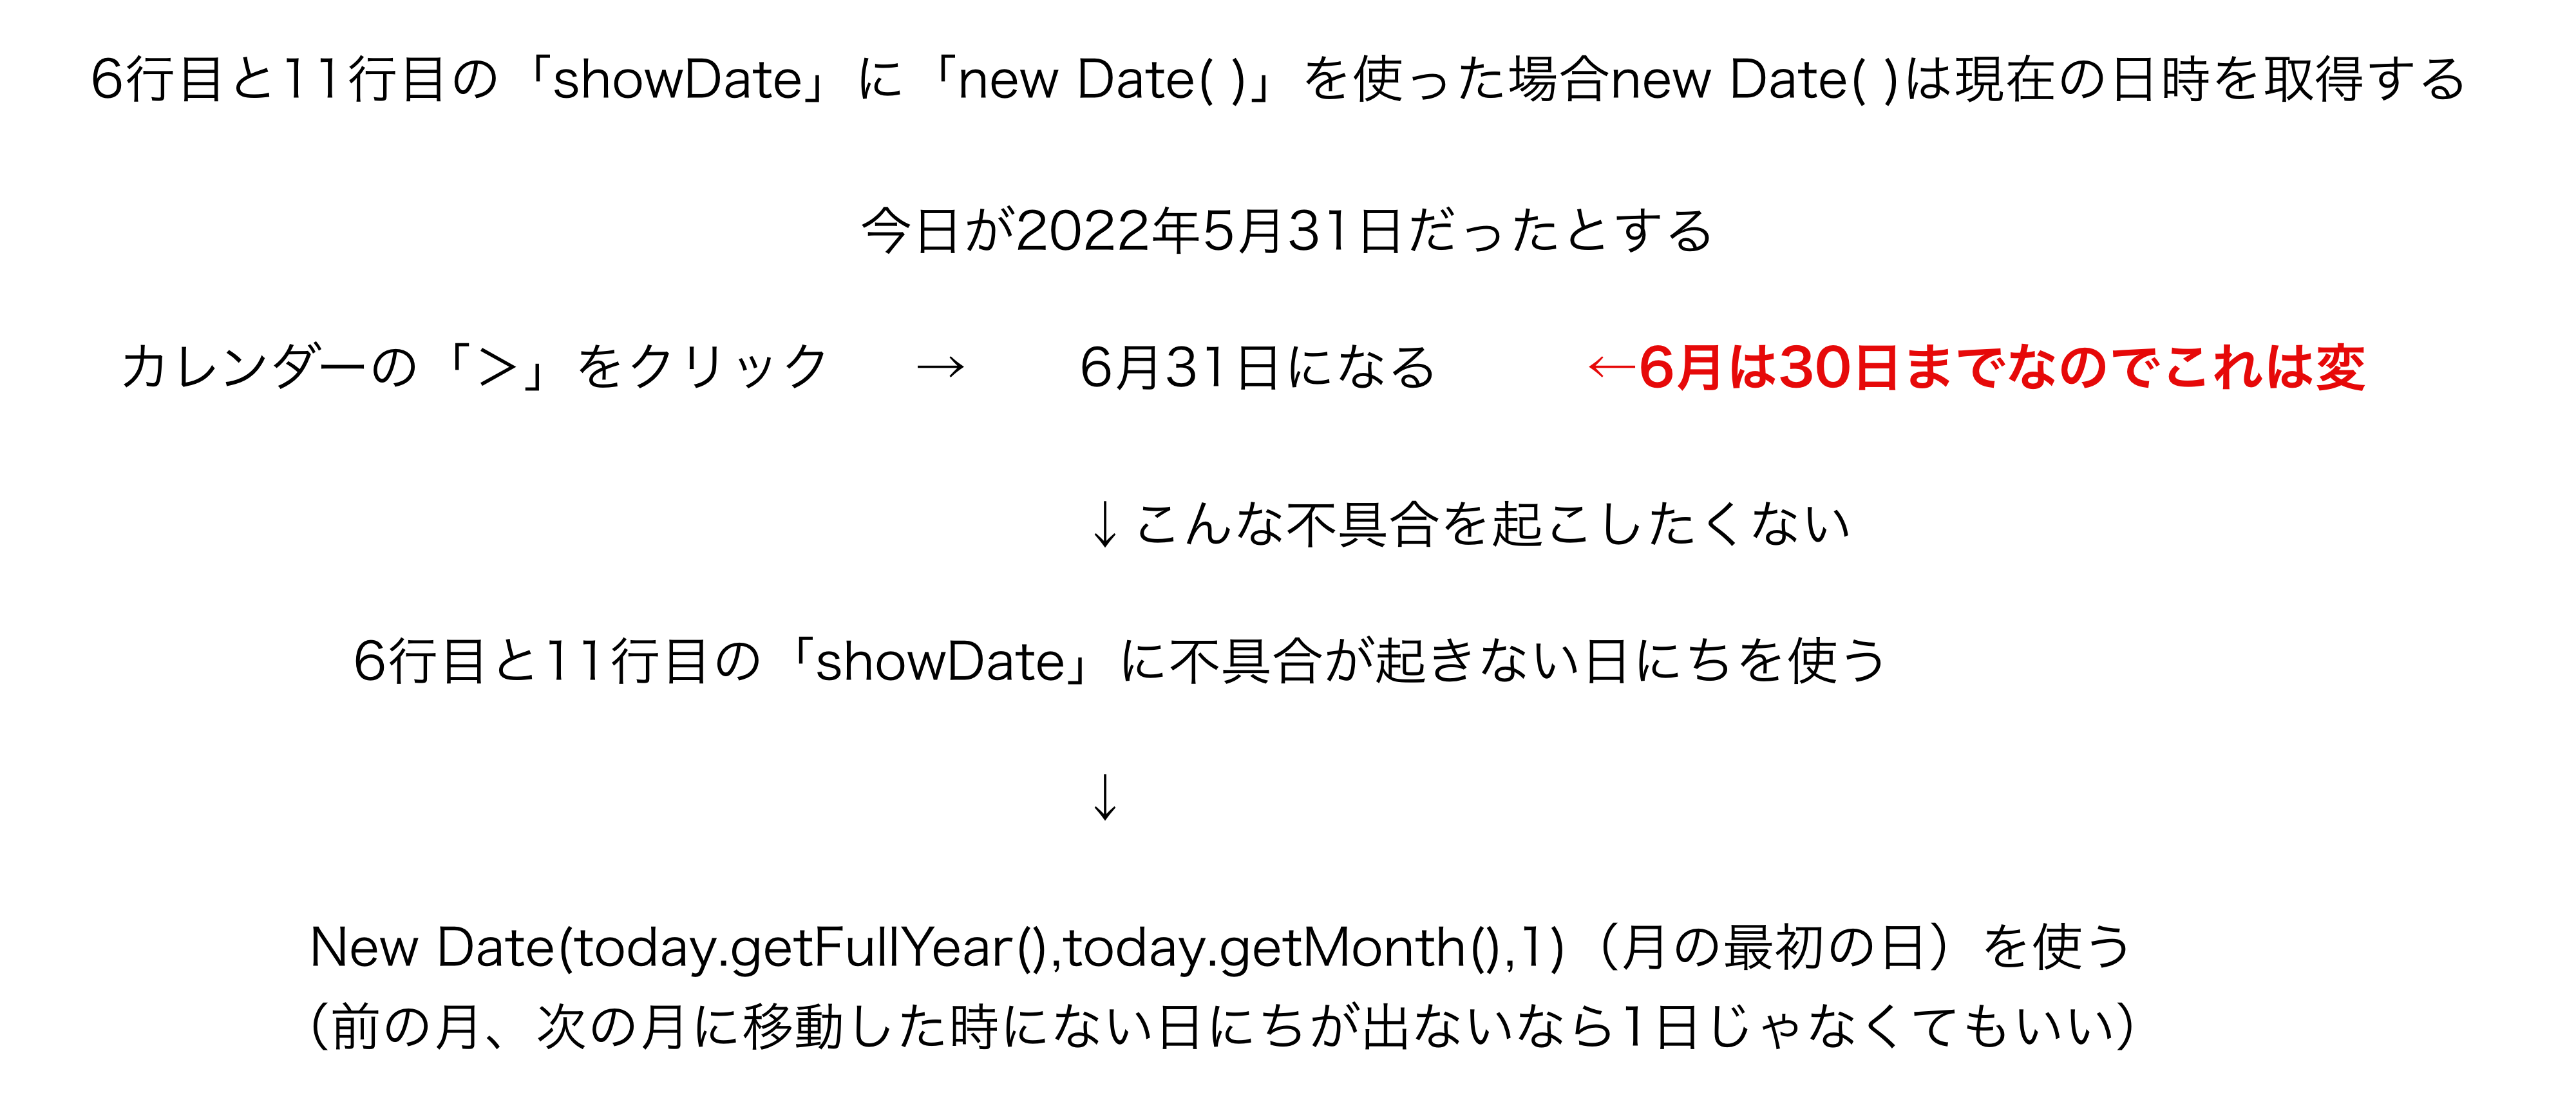
6行目と10行目の「showDate」は現在の年度の現在の月の最初の日を指しているのですが1行目の「new Date()」でもいいと思いませんか?
でも「new Date()」では不具合が起きる場合があります。
どんな時かというと例えば今の日にちが31日だったとします。
それで次の月に進んだら次の月の31日になり前の月に戻ったら前の月の31になりますが31日がない月もありますよね。(2月は28日までしかありません)
31日ががある月から31日がない月に移動するとバグが生じます。
このバグを防ぐために1日を使いたくて6行目と10行目は「showDate」を使っています。(バグが起きない日なら1日じゃなくてもいいです)
図にすると↓です。
13行目〜17行目は「2022年5月」を表示するための記述でこれを動作させているのが19行目〜21行目です。
「window.onload」はHTMLを全て読み込んだ後に作動して20行目の「createCalendar(today)」を動かします。
次はカレンダーの曜日を表示します。
曜日の表示
JavaScriptのコードを↓にします。
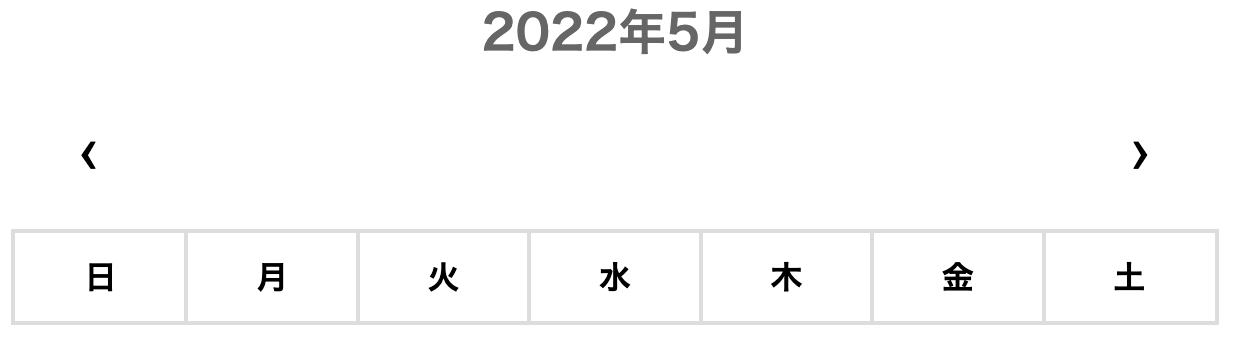
これで↓になります。
 まず33行目で曜日を配列で用意します。
35行目〜43行目で曜日を作っています。
表を作る時はテーブルタグを使いますが曜日が入った状態のコードはHTMLだと↓です。
Javascriptのコードの36行目がHTMLのコードの1行目と2行目です。
HTMLのコードの3行目〜9行目までをJavaScriptのfor文を使って作るのですが37行目〜39行目です。
日〜土までの<th>〜</th>を全て入れ終わったら<tr>の閉じタグを付けないといけないので40行目があります。
36行目のcaledarの中に日〜土を表す<th>タグが入っているのですがそれを出力して表示するので42行目があります。
calendarの中身を28行目の「createCalendar(today)」で使うためにcreateCalendar()の中にcreateTable入れるのですが20行目と21行目です。
次はカレンダーの中身を表示します。
カレンダーの中身の表示
多分JavaScriptの初心者にとってここが難しく感じると思います。
カレンダーの中身の作り方は曜日の表示と同じでfor文を使います。
曜日を作る時は日〜土を表すのに1行でしていましたが1日〜30日(31日)を表示するのは複数行になるので複雑になります。
JavaScriptのコードを↓にします。
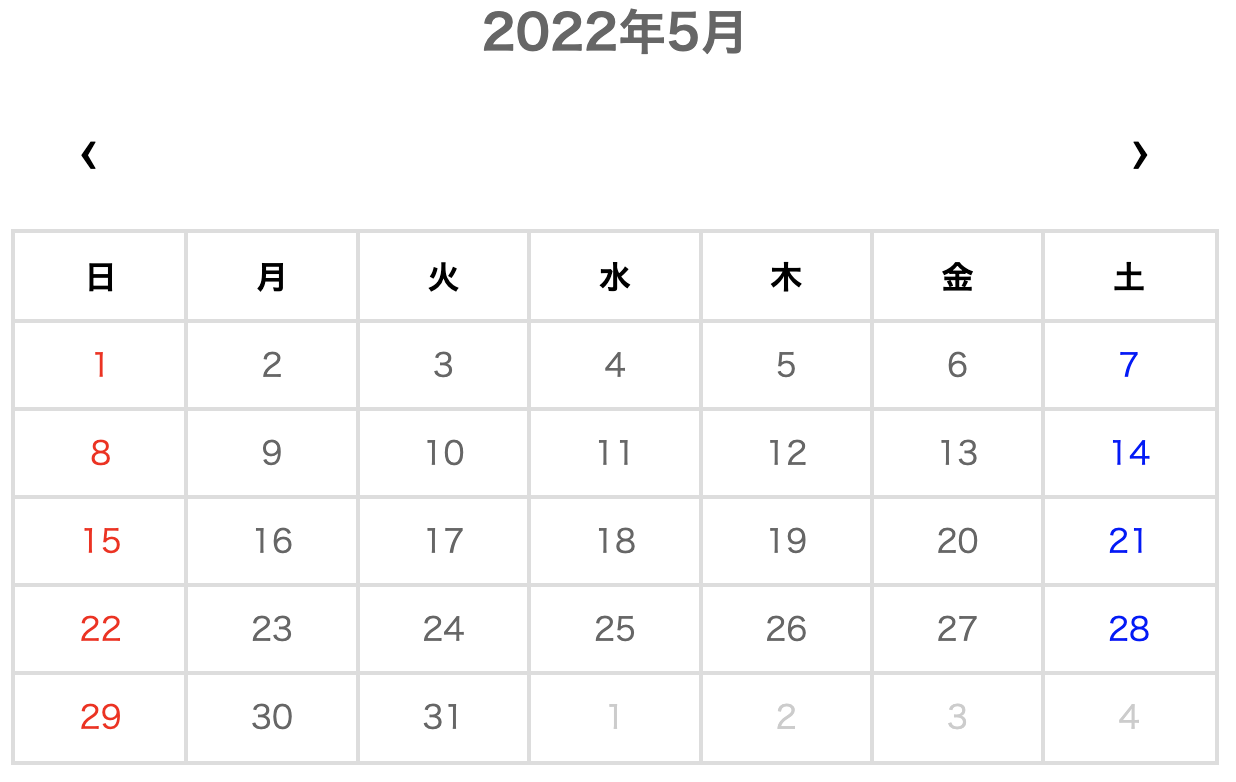
これで↓になります。
37行目の「count」は日付に使う変数です。
38行目は表示している月の最初の日で39行目は表示している月の最後の日です。
40行目は前の月の最後の日です。
41行目は表示している日のカレンダーに使う行数です。
カレンダーができる流れはこうです。
43行目のfor文で行を作ります。
図にすると↓です。
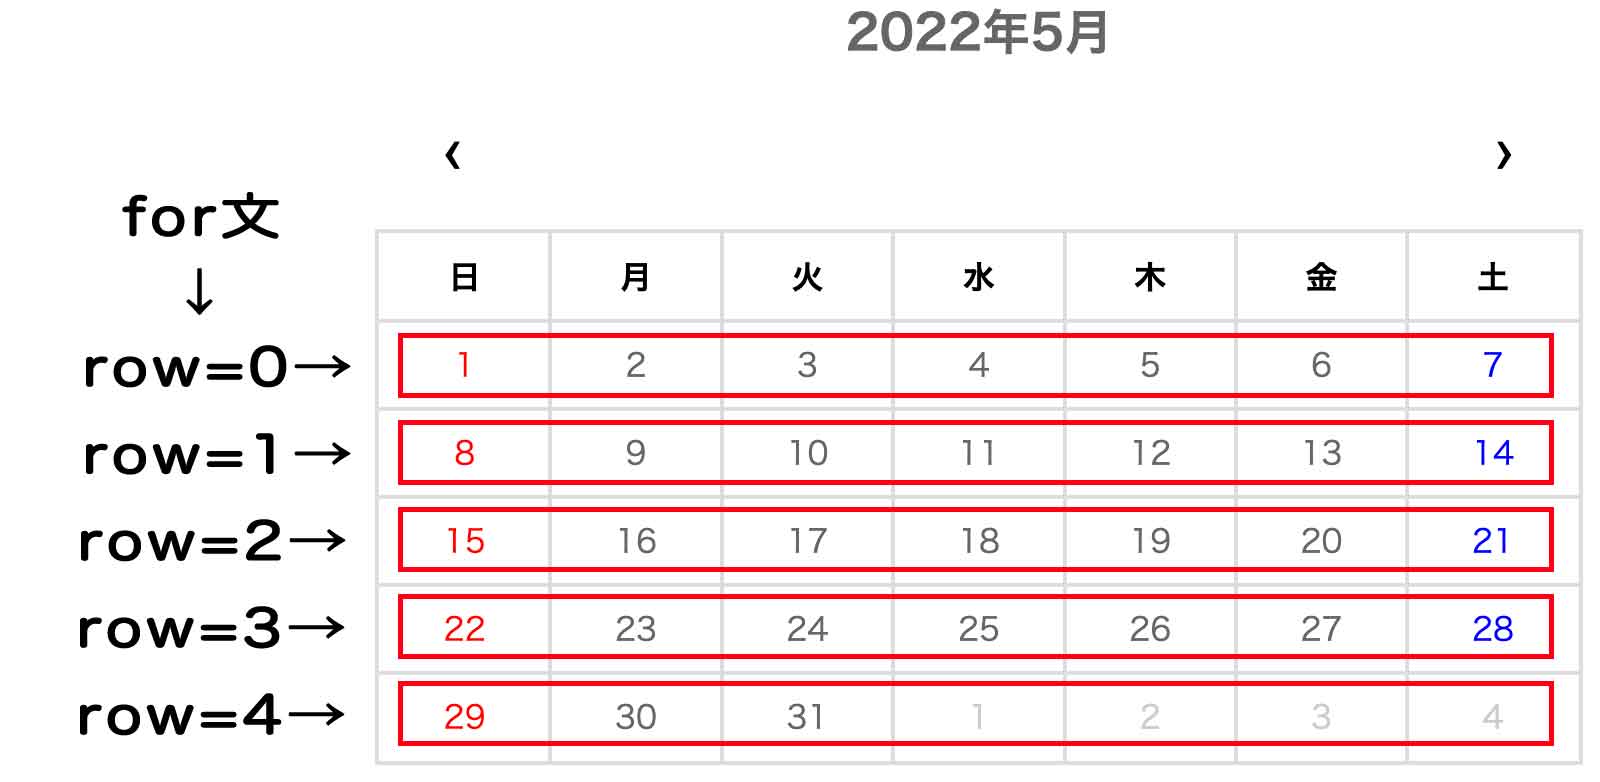
まずは「i=0」の時ですがこれで一番上の行ができます。
一番上の行の日付は1日から7日までありますがこれを45行目〜55行目のfor文で作ります。
45行目の「j=0」で日付の1日を表示して「j=1」で日付の2日を表示して、、これを繰り返して1日から7日までを作ります。
次はj=1の時で8日〜14日を作りますがこれを繰り返してカレンダーの日付ができます。
46行目と47行目のif文ですが月によっては1日の前に前月の日付が表示される場合がありますよね?
言葉では伝わりにくいと思うので↓の画像を見てください、1日の前に表示される27日〜31日のことです。
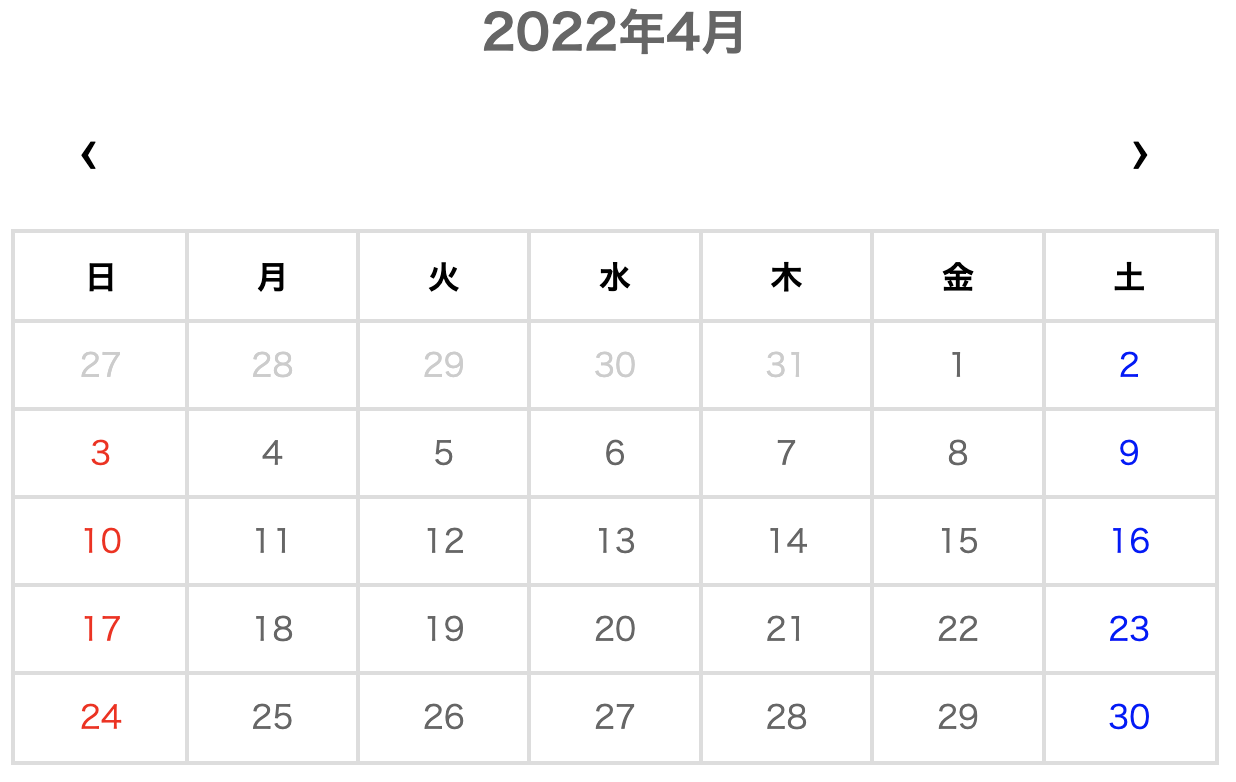
27日〜31日みたいに前の月の日付が表示される場合は文字が薄く表示するための記述です。
「こんなの思いつかない」と思った方、大丈夫です。
私も思いつきません、理解はしていますが。
書き方を丸暗記してはダメですよ、プログラミングは覚えるのではなく理解しないといけません。
理解だけした状態にして必要になったら他の人が書いたコードを見て理解してまた書けばいいだけです。
JavaScriptを始めたての人にとってこの部分が強烈に難しく感じると思います。(私がJavaScriptを勉強した手の時では理解不可能です)
難しすぎると思った方はとりあえずコピペでいいと思います。
48行目のelse if文〜50行目が次の最後の日の後に次の月の最初の日付がある場合は数字を薄く表示するための記述です。
2022年の5月31日の後に1日〜4日が薄く表示されていますがそれです。
52行目で日付が1日づつ増えて53行目で日付が表示されます。
次はカレンダーアプリを開いた時の日付の背景色がピンク色になるようにします。
本日の日付の背景色をピンク色にする
JavaScriptのコードを↓にします。
これで↓になります。

54行目〜58行目は日付が本日だったら背景色がピンク色になるけど本日ではない日付は数字だけが表示されるための記述です。
最後は「2022年5月」の下にある「>」、「<」をクリックしたら表示付きが変わってカレンダーの中身の表示が切り替わるための記述です。
カレンダーの表示を切り替える
JavaScriptのコードを↓にします。
これで完成です。