CakePHP4にCKEditorをCDNで導入する方法

1159 回閲覧されました
みなさんこんにちは、jonioです。
今回はCakePHP4にCKEditorを導入する方法を解説します。
ネットにも情報はありますが動作する記事を見つけることができなかったのでこの記事をメモとして載します。
CKEditorって何?
WordPressなどのCMSを使っている人はわかると思いますが例えばブログの内容を書くエディタのことです。
下記が実際のCKEditorになります。
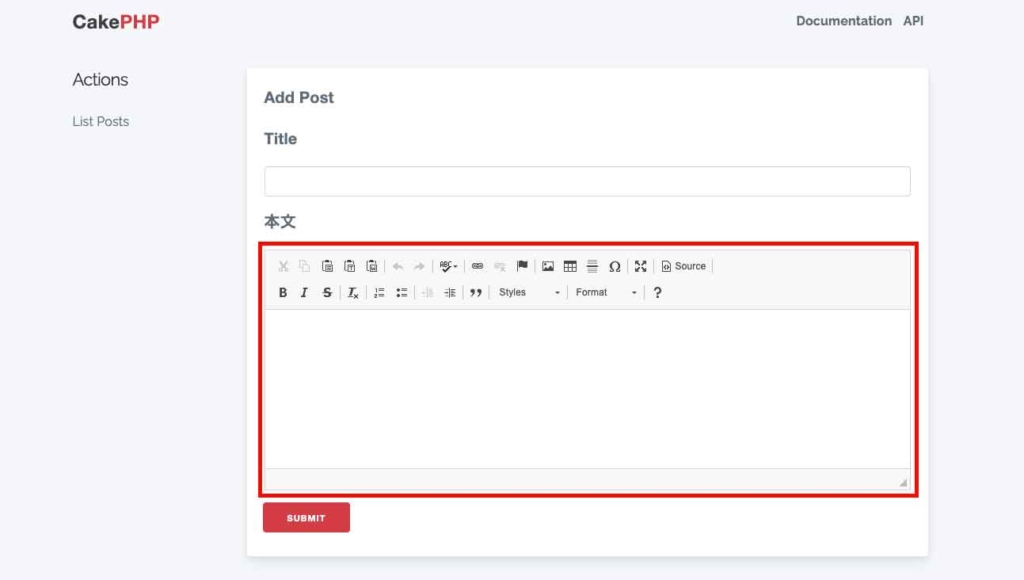
ブログをやるならこれで充分な機能だと思います。
それでは導入方法を解説します。
CDNの取得
CDNを公式サイトから取得します、ファイルをダウンロードしても実装できますが簡単に実装できるCDNでやりました。
下記の画面(CKEditのバージョンによって見た目が変わると思います)になります。
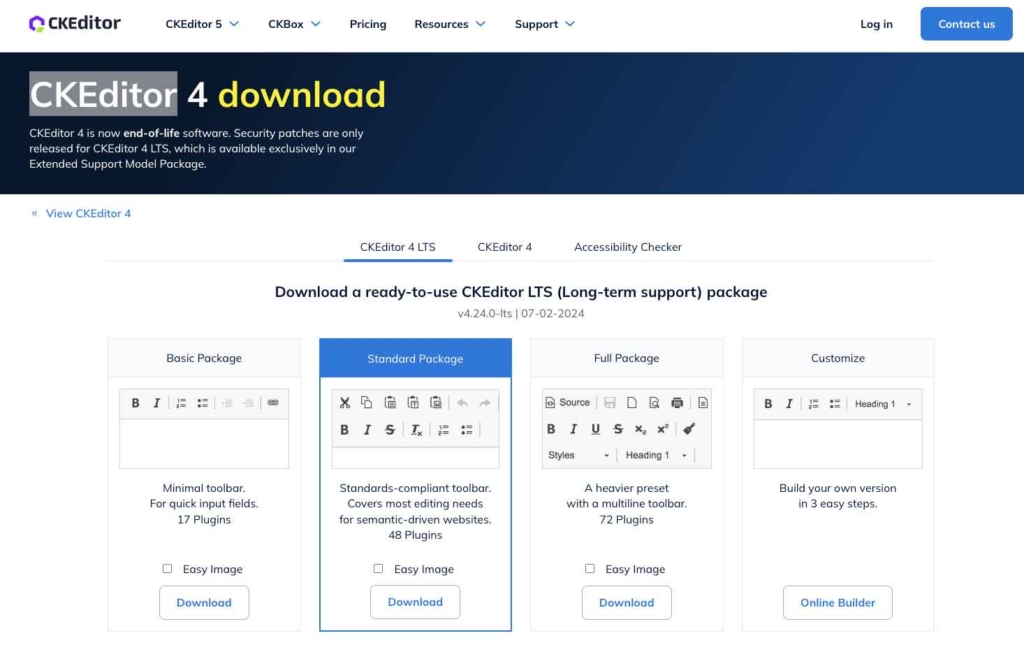
プランはBasic・Standard・Full・Customizeとあります。
多分全て無料です、私はStandardを選択しました。
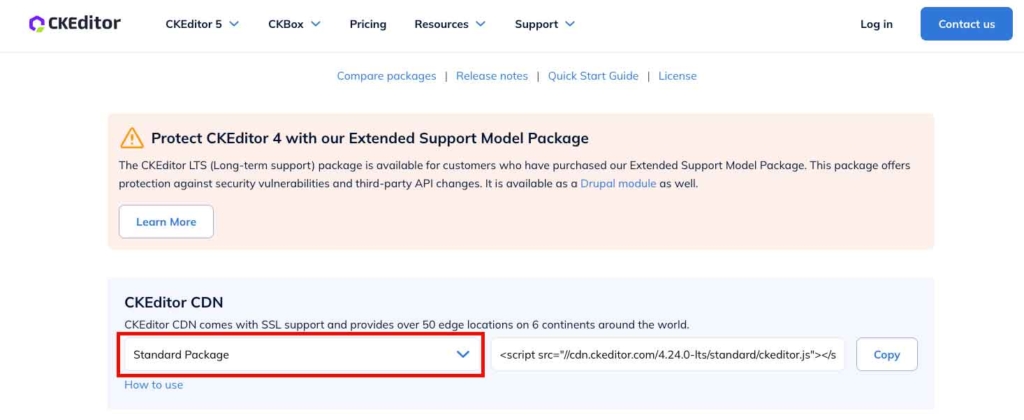
CDNはページの下の方にあります。
下記の赤枠でプランの選択ができます。
CKEditorを使う為の設定
CKEditorを使う時は使いたい全てのページで設定をしないといけません。
私はallコマンドでPostsコントローラーを作成しました、add.phpに下記の記述をします。
<?php
/**
 * @var \App\View\AppView $this
 * @var \App\Model\Entity\Post $post
 */
?>
<div class="row">
    <aside class="column">
        <div class="side-nav">
            <h4 class="heading"><?= __('Actions') ?></h4>
            <?= $this->Html->link(__('List Posts'), ['action' => 'index'], ['class' => 'side-nav-item']) ?>
        </div>
    </aside>
    <div class="column-responsive column-80">
        <div class="posts form content">
            <?= $this->Form->create($post) ?>
            <fieldset>
                <legend><?= __('Add Post') ?></legend>
                <?php
                    echo $this->Form->control('title');
                    echo $this->Form->control('content',["type"=>"textarea","cols"=>10,"rows"=>2,"label"=>"本文","id"=>"editor"]);       //この行を追加
                ?>

            </fieldset>
            <?= $this->Form->button(__('Submit')) ?>
            <?= $this->Form->end() ?>
        </div>
    </div>
</div>


//ここから追加
<?= $this->Html->script('//cdn.ckeditor.com/4.7.3/standard/ckeditor.js',['block' => true]) ?>

<script>
  CKEDITOR.replace('editor', {
  });
</script>
//ここまで追加
21行目がCKEditorを表示する為の記述です。
33行目〜38行目がCKEditorを使う為の設定です。
CDNを使うと例えば下記になっています。
<script src="//cdn.ckeditor.com/4.24.0-lts/standard/ckeditor.js"></script>「src=”〜“」の「〜」を33行目の「script(‘〜‘, [‘block’ => block])」の「〜」に書きます。
21行目と36行目に「editor」がありますが同じ名前にしないとCKEditorが機能しないので注意しましょう。
これでCKEditorが使えるようになりました。
HTMLタグも表示される
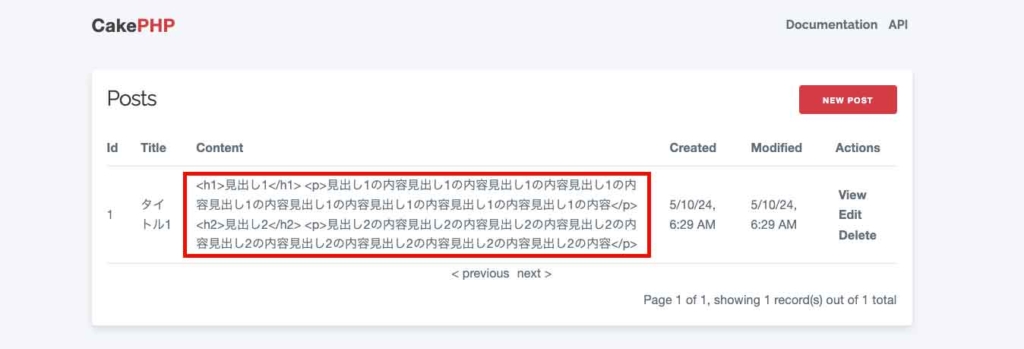
動作確認で作成します。

作成内容を保存して一覧ページを見るとHTMLタグも一緒に表示されるのを確認できます。
HTMLタグの効果を反映させてHTMLタグを表示させない為にindex.phpの記述を少し変えます。
<tbody>
  <?php foreach ($posts as $post): ?>
    <tr>
      <td><?= $this->Number->format($post->id) ?></td>
      <td><?= h($post->title) ?></td>
      <td><?= $this->Text->autoParagraph($post->content) ?></td>    //この行を修正
      <td><?= h($post->created) ?></td>
      <td><?= h($post->modified) ?></td>
      <td class="actions">
        <?= $this->Html->link(__('View'), ['action' => 'view', $post->id]) ?>
        <?= $this->Html->link(__('Edit'), ['action' => 'edit', $post->id]) ?>
        <?= $this->Form->postLink(__('Delete'), ['action' => 'delete', $post->id], ['confirm' => __('Are you sure you want to delete # {0}?', $post->id)]) ?>
      </td>
    </tr>
  <?php endforeach; ?>
</tbody>
6行目は元々「h($post->content)」だったのを修正しています。
これで表示が下記になります。
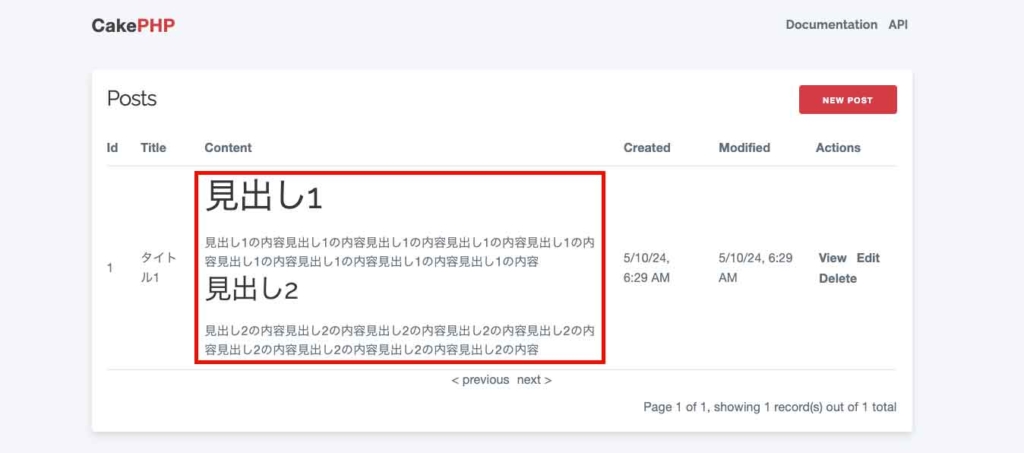
これで完成です。
画像のアップロード
CKEditを使った時に画像をアップロードする為の解説を下記の記事でしていますのでよかったらご覧ください。